반응형
이제 좋아요 버튼을 생성하여 실제 사용자가 좋아요를 클릭할수 있게 하는 작업을 하겠습니다.
그렇게 위해서 버튼을 만들고 서버에 요청을 하는 다음과 같은 작업이 필요합니다.
ArticlePage.js
import { useState, useEffect } from 'react';
import { useParams } from 'react-router-dom';
import axios from 'axios';
import NotFoundPage from './NotFoundPage';
import CommentsList from '../components/CommentsList';
import articles from './article-content';

const ArticlePage = () => {
    const [articleInfo, setArticleInfo] = useState({ upvotes: 0, comments: [] });
    const { articleId } = useParams();

    useEffect(() => {
        const loadArticleInfo = async () => {
            const response = await axios.get(`/api/articles/${articleId}`);
            const newArticleInfo = response.data;
            setArticleInfo(newArticleInfo);
        }

        loadArticleInfo();
    }, []);

    const article = articles.find(article => article.name === articleId);

    const addUpvote = async () => {
        const response = await axios.put(`/api/articles/${articleId}/upvote`);
        const updatedArticle = response.data;
        setArticleInfo(updatedArticle);
    }

    if (!article) {
        return <NotFoundPage />
    }

    return (
        <>
        <h1>{article.title}</h1>
        <div className="upvotes-section">
            <button onClick={addUpvote}>Upvote</button>
            <p>This article has {articleInfo.upvotes} upvote(s)</p>
        </div>
        {article.content.map((paragraph, i) => (
            <p key={i}>{paragraph}</p>
        ))}
        <CommentsList comments={articleInfo.comments} />
        </>
    );
}

export default ArticlePage;
그리고 이것에 응답하기 위해서 서버쪽은 지금까지 스트링으로 반환했던 응답을 JSON 객체로 리턴하게 변경합니다.
server.js
import express from 'express';
import { db, connectToDb } from './db.js';

const app = express();
app.use(express.json());

app.get('/api/articles/:name', async (req, res) => {
    const { name } = req.params;

    const article = await db.collection('articles').findOne({ name });

    if (article) {
        res.json(article);
    } else {
        res.sendStatus(404);
    }
});

app.put('/api/articles/:name/upvote', async (req, res) => {
    const { name } = req.params;

    await db.collection('articles').updateOne({ name }, {
        $inc: { upvotes: 1 },
    });
    const article = await db.collection('articles').findOne({ name });

    if (article) {
        res.json(article);
    } else {
        res.send('That article doesn\'t exist');
    }
});

app.post('/api/articles/:name/comments', async (req, res) => {
    const { name } = req.params;
    const { postedBy, text } = req.body;

    await db.collection('articles').updateOne({ name }, {
        $push: { comments: { postedBy, text } },
    });
    const article = await db.collection('articles').findOne({ name });

    if (article) {
        res.send(article.comments);
    } else {
        res.send('That article doesn\'t exist!');
    }
});

connectToDb(() => {
    console.log('Successfully connected to database!');
    app.listen(8000, () => {
        console.log('Server is listening on port 8000');
    });
})
결과 화면은 upvote 버튼을 클릭할때 마다 숫자가 올라갑니다.
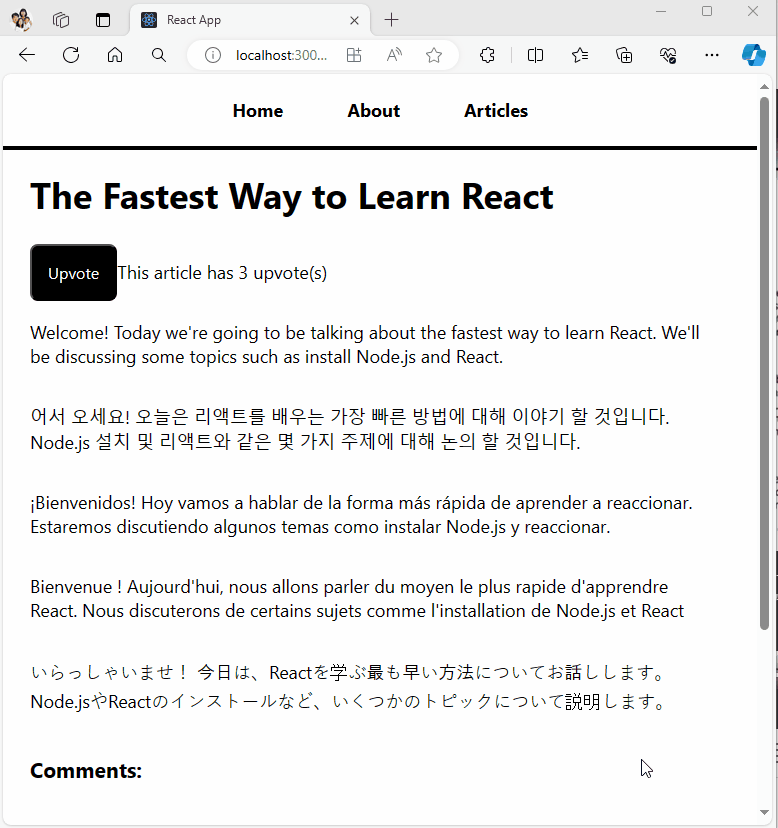
브라우저 Refresh를 해도 좋아요 갯수는 변하지 않습니다.
기본적으로 버튼을 눌러 서버에 좋아요 갯수를 하나 늘려달라고 요청하고 서버는 그 요청을 받아서 데이터베이스에 저장한다음 다시 업데이트된 데이터를 클라이언트한테 보냅니다. 여기서 Full Stack의 기본적인 활동이 이루어지고 있습니다.
반응형
'PROGRAMING > FULL STACK' 카테고리의 다른 글
| [Auth] Firebase Auth (0) | 2024.03.23 |
|---|---|
| [Front End - Back End] Creating an add comment form (0) | 2024.03.21 |
| [Front End - Back End] Displaying comments (0) | 2024.03.21 |
| [Front End - Back End] Adding data loading to page components (0) | 2024.03.21 |
| [Front End - Back End] Adding React hooks (0) | 2024.03.21 |